Roasted Asparagus and a Happy, Homely Little Accident

Easter is over but for the hardboiled eggs, jelly beans, and leftovers.  Glorious, hammy leftovers.  But this post isn’t about all the ways to use your leftover Easter eggs, candy, or even that ham.  This is about my happy, homely little accident.  That’s right, homely, not homey.  ‘Cause this asparagus sure ain’t purty.

These might not be pretty, but they're pretty delicious!

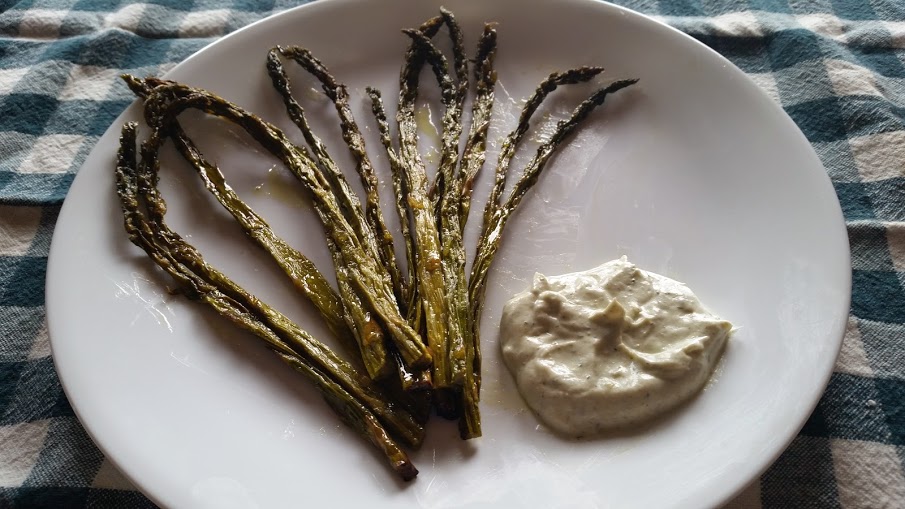
These stalks might not be pretty, but they’re pretty delicious!

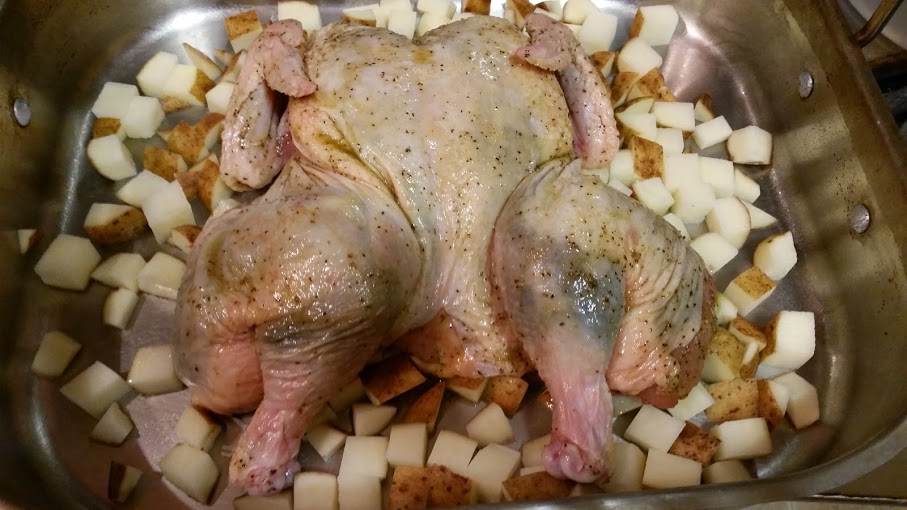
The kids were with their mom for Easter this year, so it was just Mr. Pants, the doggies, and yours truly.  We decided to make a huge bone-in ham as usual because, well, because “glorious, hammy leftovers”, remember?  There were a couple other favorite holiday dishes beloved of Mr. Pants, and I decided I would treat myself to roasted asparagus.  I say “myself” because Mr. Pants does not eat asparagus.  More for me!  I turned the oven off when the asparagus was just about done, finished the rest of the dishes, carved the ham, aaand promptly forgot I had asparagus in the oven until we started cleaning up after dinner.  Into a container the asparagus and juices went, like the rest of the leftovers, to be eaten later.

I got home from work this afternoon and found myself hungry for a snack.  Aha!  I have leftover asparagus in the fridge that I’ll just nuke a little bit and warm up!  A light snack that I could nibble with a favorite veggie dip.  Now, here’s where the happy accident part comes in.  I nabbed a cold asparagus spear before placing the container in the microwave and took a bite.  I tasted asparagus.  I tasted the sea salt, olive oil, and Ghee the asparagus had been roasted in.  I tasted…. Ambrosia.  Because they had been left in the hot oven, they were roasted longer than usual.  They were shriveled, but had achieved a caramelization I hadn’t had with asparagus before.  Then during their stay in the refrigerator they had continued to soak up all the flavors of the fruity olive oil and nutty Ghee; even the brininess of the sea salt seemed intensified.  While the stems were soft, the tips were still nice and crunchy from the roasting.  I can’t decide which end I liked best.

I had made myself a lemony, garlicky, dill-icious (see what I did there?) dip that’s perfect with the brightness of asparagus, and I’ve included the recipe.  I even served some with my snack.  I just didn’t find myself using it, preferring to eat the cold spears on their own!  If you want to use the dip, I suggest you make it a couple days ahead of time to give the garlic time to mellow and the flavors time to meld.

A quick word about Ghee: this is a clarified butter used in Indian cooking.  It’s made a little differently than the clarified butter you dip your crab legs in.  Instead of removing the milk solids, the solids are left to caramelize at the bottom of the pan, leaving the Ghee with a nutty flavor.  It also has a higher smoke point than regular butter, so it’s perfect for high heat roasting.  Find it in the organic section of your grocery store, at your local health food store, or online (I know Amazon carries it).  It’s a little spendy (I spent about $8 for a 7.5 oz jar at a local store), but it doesn’t take much to impart big flavor, so a small jar goes a long way. It’s shelf stable even after opening (as long as you store it in a “cool, dark location”), so it lasts a long time, too.  Okay, that was not a quick word about Ghee, but don’t you feel better informed now?  Well, that’s what I’m going to let myself believe.  You don’t have to use it here, but I honestly think it added to the overall scrumptiousness of the asparagus!

This asparagus is delicious right from the oven, but I encourage you to either make it the day before and serve cold or at room temperature, or make extra so you can give yourself a delicious snack the next day!

Roasted Asparagus with Scrump-Dilly-icious Dip

  • Servings: 4 normal people, 1 me
  • Print

for the dip:

1/2 cup Greek yogurt or light sour cream
1/2 cup mayonnaise
1 garlic clove, minced
1 Tablespoon lemon juice
zest of 1/2 to whole lemon
1 Tablespoon fresh dill

Mix all ingredients together and refrigerate until ready to use.  I like to prepare this a day or two ahead of time, then I can adjust amounts of garlic, lemon zest, and dill to taste.

for the asparagus:

1-2 bundles of asparagus, woody ends removed (bend an asparagus stalk near the end to find the natural breaking point; cut all the stalks at the same spot and you should be good)
1 Tablespoon olive oil and 1 Tablespoon Ghee, melted and mixed together; or 2 Tablespoons olive oil
healthy pinch (use 2-3 fingers plus your thumb to pinch) sea salt or Kosher salt

Preheat the oven to 425 degrees.

Toss the asparagus in the oil and Ghee mixture (or just oil if omitting the Ghee), and sprinkle with the salt.  Spread the asparagus out on a lined sheet pan and roast for about 30 minutes or until the asparagus achieves caramelization (this will depend on the thickness of the stalks).

Spatchcock is Not a Dirty Word!

Spatchcock, spatchcock, spatchcock. Are you getting the idea that I’m only posting this because I like to say spatchcock (heehee)? Yeah, that’s got a lot to do with it (apparently my inner child is a 13-year old boy), but more important, this chicken is delicious!

Beautifully crispy, and delicious!

Beautifully crispy, and delicious!

To spatchcock (snort) a chicken, is to cut out the backbone and flatten it. This will ensure the bird roasts evenly, so the thigh is cooked through and the breast is still juicy. You also get crispy skin on the entire bird, and because it’s flattened, it roasts much more quickly than a whole bird.

In order to spatchcock (giggity – OK, I think I’m done now), place the bird, breast down, on a cutting board. With heavy-duty kitchen shears, cut along both sides of the backbone and remove. Reserve the backbone for stock.* Flip the bird over, place the heel of your hand on top of the breastbone, place your other hand on top of that hand, and push down – HARD – to crack the breastbone. You now have a beautifully spatchcocked chicken!

Your bird, breast-down, ready to be spatchcocked!

Your bird, breast-down, ready to be spatchcocked!

Remember to save that backbone!

Remember to save that backbone!

This bird has been thoroughly rubbed and massaged.  I would think it spoiled, but the chicken would probably disagree.

This bird has been thoroughly rubbed and massaged. I would think it spoiled, but the chicken would probably disagree.

See those dark spots under the skin?  Herb-y goodness!

See those dark spots under the skin? Herb-y goodness!

By the way, this technique is also called butterflying. This is not nearly as fun to say, and therefore, will not be used here.

You’ll want to use a neutral oil for your paste, and one that can take high heat. Grape seed oil is an excellent, but expensive choice; canola oil is a solid choice, and easy to find; rice bran oil can withstand high temperatures, and is my go-to for high temperature cooking. You can season your bird any way you like; here are some of my favorites to make a paste with:

Cavender’s Greek Seasoning, lemon juice
Sage, thyme, salt and pepper to taste
Chinese five spice powder, orange juice, dash of soy sauce
Rosemary, fresh minced garlic, salt and pepper to taste
Cabela’s Sweet Rib Rub, garlic powder

*Reserving parts and pieces for stock: You have a stock bag, right? You know, the big zip top bag where you place all your bones and bits till it’s time to make stock? You don’t?!? Well, you can start now! Place the reserved back bone and your chicken carcass in a freezer-duty zip top bag, and place in freezer. Ta-dah!!

I roast my bird on top of some cubed potatoes. It rids me of the need to use – and then clean – my roasting rack, and my potatoes benefit from all the drippings from the chicken. Because there is a lot of oil in the wet rub, and fat from the chicken, I don’t toss the potatoes in oil ahead of time; they still turned out crispy on the outside and soft on the inside.

Spatchcocked Chicken with Roasted Potatoes

Ingredients

1/4 cup seasoning
1/4 cup rice bran oil
1 Tablespoon fruit juice (if using)
1 (4-5) pound chicken, spatchcocked as described above
3-4 medium potatoes (I used unpeeled russets), cubed, rinsed, and pat-dried with paper towel

Directions

Mix together your seasoning, oil and juice (if using) to make a wet rub. If it is too thick, use a little more oil; you want it to be a little runny.

Pat dry the spatchcocked chicken thoroughly with paper towels and place in a large bowl. Gently run your finger between the skin and meat of the thigh, leg, and breast; be careful not to tear the skin. With your fingers or a small spoon, place some rub under the skin. Rub the rest of the mixture on the outside of the bird, all over. Massage it a bit to get the rub under the skin distributed. Place the bird in the refrigerator overnight, uncovered. This will help to tighten the skin, resulting in crispier skin. You may need to squish and squeeze the bird a bit to make it fit your bowl; this is fine, you just want as much skin exposed to the air as possible.

Take the bird out of the refrigerator about 30 minutes before roasting.

Preheat oven to 450 degrees.

Lightly oil or spray a large roasting pan. Spread cubed potatoes in the bottom of the pan. Place the chicken, skin side up, on top of the potatoes. Place the roasting pan on the middle rack of the oven.

Roast until an instant-read thermometer registers 165 degrees when inserted into the thickest part of the breast and of the thigh, about 35-45 minutes. Be careful not to touch the bone when testing doneness, as the bone will be hotter than the meat.

Remove the chicken to a plate, tent with tinfoil and set aside to rest, about 15-20 minutes. Meanwhile, stir the potatoes about with a wooden or silicone spoon, scraping up any brown bits. Place the roasting pan back in the oven and continue roasting until the potatoes have crisped up a bit.

With a sharp knife, cut the leg quarter (thigh and leg) away from the breast of the chicken. Cut the leg from the thigh at the joint. Cut the wing away from the breast. At the base of one side of the breast, slice horizontally until you hit the breastbone. Slice vertically at the breastbone to the horizontal cut you made, until you can remove one entire breast. Repeat with the other side. Cut the breast into slices.

Plate some potatoes and chicken, serve, and prepare for the compliments!