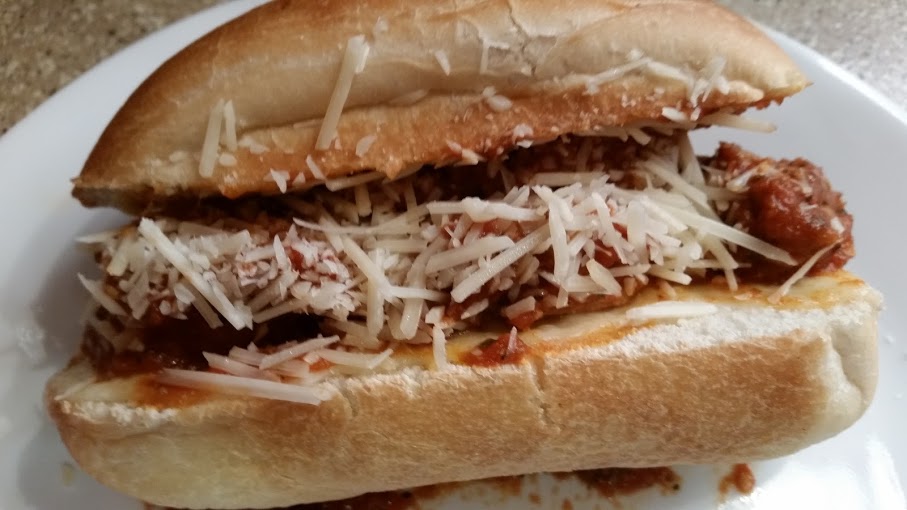
Having a hunter for a husband means a freezer full of venison. When venison is treated correctly in the field, and then in the kitchen, you get a richly flavored, lean red meat. Venison fits beautifully into a heart-healthy diet… most of the time. Once in a while, I like to thaw out a couple cube steaks and make chicken fried venison. Not something for every day, but there is no reason not to indulge occasionally!
A creamy country-style gravy made with the pan drippings and some Rustic Smashed Potatoes are the perfect accompaniment; add your favorite vegetable, and you have a hearty dinner perfect for a cool-weather evening!

Ultimate comfort food!
I generally start my potatoes first as they take the longest to cook, and because they have a good “pausing point” before smashing so I can time everything to come out about the same time. (I feel that good timing is a critical part of being an excellent home cook, and it can be challenging which is part of the fun for me! Yep, I’m a cooking nerd.) I call them “rustic smashed” potatoes because I don’t peel the potatoes, and the texture is chunkier than my regular mashed potatoes. You won’t hurt my feelings if you use another potato recipe, I promise.
To fry the steaks in the past, I’ve used canola oil, olive oil, butter, even reserved bacon fat. This time, I used rendered goose fat that I ordered online from Schiltz Goose Farm*, right here in my home state of South Dakota. I was on the website to order their insanely delicious smoked goose breast, and as I am wont to do when online, started wandering about the site. I was thrilled to discover they sell rendered goose fat in quantities that make sense for the home cook.
I render my own duck fat after making our now-traditional Thanksgiving or Christmas duck. I’ve reserved that duck fat for use in frying potatoes and root vegetables and using it in my paste rubs for meat. It’s delicious, but I’ll be honest, ducks are actually pretty small and you don’t get a lot of reserved duck fat return for your time investment. So when I found the rendered goose fat on the Schiltz website, I felt like I’d struck gold. Rich, decadent, creamy gold. (“Why not just roast a Christmas goose and render that fat”, you ask? Well, geese are pricier than ducks and this is an excellent solution! Besides, I really don’t know how many geese I’d have to roast to obtain 2.5 lbs of rendered goose fat. But if I ever roast a Christmas goose, I’ll be sure to share my roasting and rendering results!)
Goose fat is one of those fats that is actually better for you than butter or lard because it is rich in oleic acid. What this means to people who are watching their cholesterol is that it is a monounsaturated fatty acid that can actually lower blood cholesterol levels. What it means to me is that I don’t have to feel too guilty for using it to fry in! Honestly, I don’t know how much I’d worry anyway as rendered goose fat is – heavenly, ambrosial, transcendent even. Ok, that might be laying it on a little thick, but frying in duck or goose fat really does lend a depth of flavor that, well, that transcends more conventional oils for me.
I received my goose fat in a tub that fits right in my freezer. When I opened the tub, the first thing I noticed was the color. It was a creamy ivory color, definitely purer than anything I’d ever achieved with my own rendering efforts. The smell reminded me of my mom’s house as she made her famous-to-us fried chicken (maybe I wasn’t laying it on too thick when I used the word transcendent).
Now on to the cream gravy! Making gravy used to intimidate me until I got used to making a white roux. Now, I find it pretty easy to throw together while the meat rests. After roasting or frying take your meat out of the pan to rest, add flour in equal amounts to the fat and drippings left behind, whisk until smooth. Add your room temperature liquid (cold, it takes forever to cook; too warm and you have lumps), add salt and pepper to taste. Whisk, whisk, whisk. Pretty soon you have cream gravy!

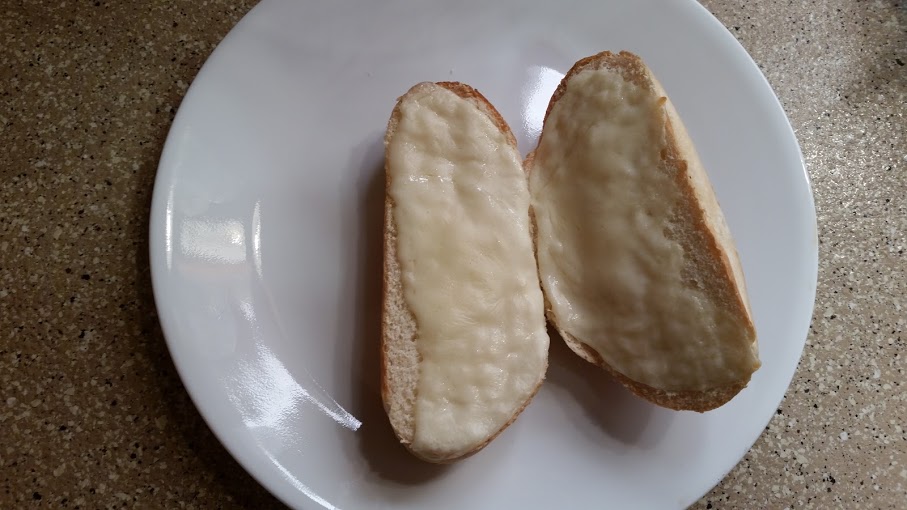
What you don’t know is another ladle-full of gravy went on after the picture was taken. Ssshh.
*I contacted Schiltz to make sure I could use their name (I would have hated to receive my first cease and desist – I mean, what do you do with that? Surely you don’t frame it like the first dollar you ever made!), and they graciously gave their permission. I’m not receiving any compensation for talking about them whatsoever; I truly love this company and I’m so proud they’re from South Dakota too! They have a lot of different products; their smoked goose breast is a favorite on our meat and cheese board. They also sell goose liver from geese that have never been force-fed, it that’s a concern of yours. I’ll definitely be buying some when I’m ready to try my hand at making paté! They just recently updated their website; it’s beautiful and has a wonderful FAQ section that includes great cooking tips and some interesting information about their geese!
Chicken Fried Venison with Cream Gravy
For the venison:
Ingredients
Directions
Place the cube steaks in a gallon size ziplock and pour in enough milk so all steaks are submerged. Lay flat on a baking sheet and place in the refrigerator overnight, flipping once (the lactic acid in milk works to tenderize the meat, as well as draw a lot of blood out. Normally I love the rich taste of venison, but it can be a little strong. This works to ensure there is no gamy flavor.).
A half hour before you plan on cooking, take the meat out of the milk. Pat dry with paper towels. Place on a plate and cover with plastic wrap.
Preheat the oven to the lowest temperature setting, usually 150-200° (my old 60’s oven goes down to 140°, so that’s what I use).
Place the flour in a pie plate or like container. Break the eggs into another pie plate and beat to incorporate the whites and yolks. Place two baking sheets and the seasoned panko within reach. Dredge a cube steak in flour, dip in the egg and place on a baking sheet. Repeat until all the steaks have been treated to their flour dip and egg bath. Add the panko to the flour, using a fork to stir well. Dredge the steaks one-at-a-time in the flour and panko mixture and place on a clean baking sheet.
In a large skillet over medium heat, heat the oil or fat. When it begins to shimmer, take a pinch of flour and drop it in the oil. If the oil and flour sizzle immediately, your oil should be ready.
Place a cooling rack atop another clean baking sheet (washing and drying the egg-y one, if necessary), and keep nearby. Place as many steaks as will comfortably fit in your frying pan. Do not crowd them! Fry the steaks until golden brown, about 2 minutes per side. Remove from the pan and place on the cooling rack, put the baking sheet into your pre-warmed oven to keep warm while the rest of the steaks cook. Repeat as necessary until all your steaks are golden brown!
While the steaks rest in the oven, you want to start your cream gravy.
for the gravy:
Ingredients
Directions
Lower the heat under your pan drippings to medium-low. Sprinkle the flour in a bit at a time, whisking constantly until you have a texture like wet sand. Continue whisking for a couple minutes to help cook out the raw flour taste. When you see the roux begin to change color, begin adding the milk slowly, whisking constantly. Add the salt and pepper, and continue whisking until the gravy is smooth and thickened. Add more milk if needed, tasting and adjusting the seasoning as needed.
Plate the steaks and pour or ladle the gravy over the top!
Rustic Smashed Potatoes
Ingredients
Directions
Place the cubed potatoes in a medium stock pot, add cold water to cover by about an inch. Add the salt. Over high heat, bring the potatoes to a boil. Immediately turn the heat down until the potatoes are simmering and let them simmer for about 15 minutes. Test doneness; a fork should easily slide right through the potatoes. Continue simmering if necessary, about 5 more minutes.
Drain the potatoes in a colander. Add back to the stock pot and place on low heat. Stir gently until dry, about a minute. Begin smashing the potatoes with a potato masher, slowly adding the milk. Stop smashing when you have reached the chunky-to-smooth ratio you like.
Spoon the potatoes into a serving dish. Make a well in the center of the potatoes with the spoon, and add the softened butter to the well.